Mounting the Sensors
We’ve provided every KUBE KIT with a set of magnets to help you quickly mount your sensors onto a variety of surfaces.
For Magnetic Metal Surfaces:
Before installing, test to see if the surface has adequate magnetic force. The supplied magnets have an overall magnetic force of 10kgs.
If higher forces are required, one can attach larger magnets as long as they can accommodate M3 type machine screws.
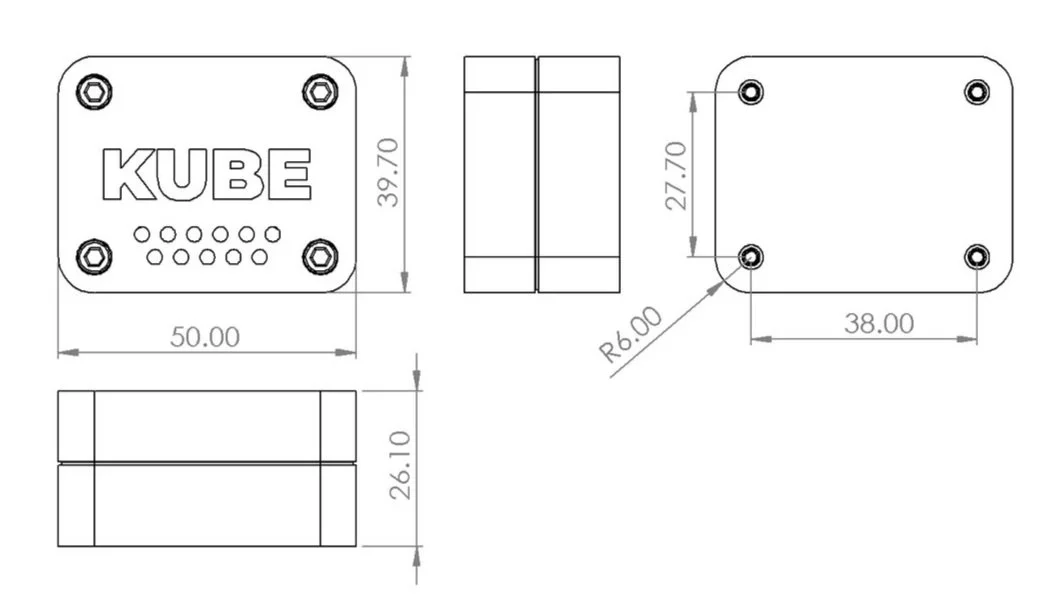
Using the supplied magnets, 2mm Allen key and M3 countersunk screws included in the box, carefully attach each magnet into the 4 x M3 threaded inserts on the rear of the casing as shown.

For Non Magnetic Surfaces:
Depending on the type of surface, you should use a compatible adhesive or mounting tape.
Attach the tape to the rear side of the sensor and press evenly for 1 minute.
Clean the mounting area and ensure that there are no liquids, oils or dust that could reduce the effectiveness of the adhesive.
After identifying the desired location, peel of the opposite side of the tape.
Carefully press the sensor down onto the mounting surface for 1 minute.
If you would like to create a custom mounting bracket, the rear 4 x M3 hole spacing is shown in the figure below. The threads on the rear side can take bolts with thread lengths of up to 8mm. Mechanical drawings of the enclosure size can be found in the documentation section here.